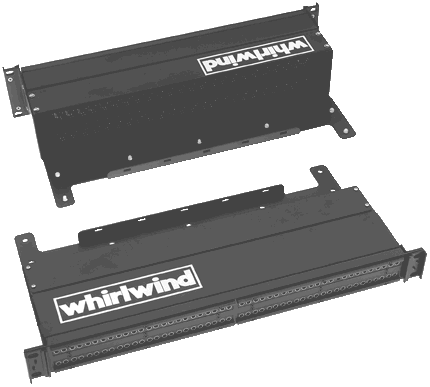
1. Jacks and Plugs
There are two sizes of patch bay jacks and plugs.
The bays used with approximately 1/4" diameter
plugs are known as Longframe, while the
bays used with 11/64" diameter plugs are
known as Bantam, TT, or Tiny Telephone.
A Whirlwind Longframe bay has 24 jacks per
row providing 48 patch points
(also referred to as a 48 point patch
bay). A Whirlwind TT bay has two rows
of 48 jacks each, providing 96 patch points.
2. Wiring
The convention for patch bay wiring is that
they are configured with two rows of jacks,
one above the other, with the top row wired to
equipment outputs, and the bottom row wired to
equipment inputs. The jacks are numbered in
a standard left to right,top to bottom scheme
(Top Row: 1-24 LONGFRAME or 1-48 TT, Bottom Row: 25-48
LONGFRAME or 49-96 TT).
3. Normalling
Typically patch bays are wired so that with no patch cables inserted,
each jack in the top row is automatically connected to the jack
immediately below it in the bottom row. By planning your wiring
in advance, this arrangement will let you connect the outputs of
equipment (wired to the top row jacks) to the inputs of other
equipment (wired to the bottom row jacks) in the most often used
configuration. Then, when you need to do something special,
you can insert a patch cord and change the way signals are connected.
Normalling is the term used to describe this configuration
(you have pre-selected your "Normal" signal routing).There are
two common forms of normalling: HALF NORMAL and FULL
NORMAL. HALF NORMAL (HN) connects the top row (output)
jack to switching contacts on the (input) jack just below it. When
you plug a patch cord into the top (output) jack on an HN patch
bay, the output signal wired to that top jack stays connected to
the (input) jack below it and therefore continues to be connected
to the equipment wired to that input jack. At the same time, the
output signal from the top jack is now connected to your patch
cord and can be plugged into another input jack on the patch bay.
The result is one output going to two inputs. When you plug a p
atch cord into a bottom row (input) jack on an HN patch bay,
however, the "Normal" connection between that input jack and
the (output) jack just above it is disconnected. Using the patch
cord, you can route that input to a different output. FULL
NORMAL (FN) uses switching contacts in both rows of jacks.
Plugging a cord into either the top row (output) or the bottom
row (input) of a full normalled bay disconnects the "Normal" signal
flow from the top jack to bottom jack. Patch cords connected to
the top jack have access to the output signal of the device wired to that
jack. Patch cords connected to the bottom jack have access to the
input of the device wired to that jack.
4. Grounding
Grounding throughout a patch bay wiring system can become a very
complicated issue. To keep ground-loop induced hum from entering
your system, it is important to decide on a uniform method of
interconnecting equipment chassis grounds and audio shields. There
are several schools of thought regarding what type of grounding
configuration is most effective. Consequently, we offer a number
of standard shield termination configurations, including four options
for the termination of shields at the patch bay. These options are
designated ST, SB, SS, and SN.
The ST (Shields Terminated) designation indicates that the shield
for each wire will be terminated only at the jack terminal. Shield wires
do not interconnect from jack to jack.
The SB (Shields Bussed) designation indicates bussed shields.
Each row of jacks has a buss bar that connects all shield connections
from that row together and is brought out with a single ground-wire
lead.
The SS (Shields Strapped) designation indicates strapped shields,
meaning that the shield of each top row output jack is connected to
the shield of the input jack directly below it. This connection remains
whether or not patch cables are inserted into the jacks.
The SN (Shields Normalled) designation requires a special patch bay
using jacks with shield normalling switch contacts. These contacts
allow the shield to be either half or full normalled from a jack in the
top row to the jack immediately below it. This is the least common
of these grounding schemes.
5. Termination
The wiring to connect the patch bay to your equipment can
be done in several ways:
� Cables can be pre-wired to the jacks in your patch bay and left blunt
cut or trimmed and prepped as required.
� Connectors can be soldered onto "cable tails" (shielded
pair wires soldered to the jacks in your patch bay and long enough
to reach your equipment) for direct connection to your gear. It is
possible to specify the ground scheme at the equipment connectors.
For individual XLRs, 1/4", or RCA connectors, the shield is
connected to the appropriate terminal of the connector. The GL
(Ground Lift) designation indicates that the shield is left
disconnected at the connector.
� Inline or chassis multipin connectors can be wired to short lengths
of cable soldered to the jacks in your patch bay. You then connect
cables between these connectors and your equipment. This
arrangement allows you to easily remove the patch bay from your
system while leaving the basic wiring from your equipment to the
patch bay intact.
� Whirlwind MPB punch blocks are available pre-wired to the jacks
of your patch bay for rapid, solderless "insulation displacement"
field termination of wires running to your equipment.
6. Cleaning
Whirlwind recommends cleaning patch bays by inserting a clean
plug five or six times into a jack. The use of chemical cleaners or
compressed air is not recommended.
7. Labelling
Dezzy strip software from ADC (PPDS-1) produces professional
designation strips for all ADC and Whirlwind patch bays. The
program allows you to choose the font size and style as well as
the background color, and runs on *Windows 95TM or NT platforms.
The model number for Whirlwind patch bays is formed by
completing each block from the categories below. For non-standard
configurations, please call.
|